Alone Season 8, where the longest lasting survivor will win $500,000, in the most popular survival show ever on TV. In Season 7, the Winner, who stayed over 100 days won $1,000,000. Yes, One Million Dollars. Let's meet the Season 8 Cast.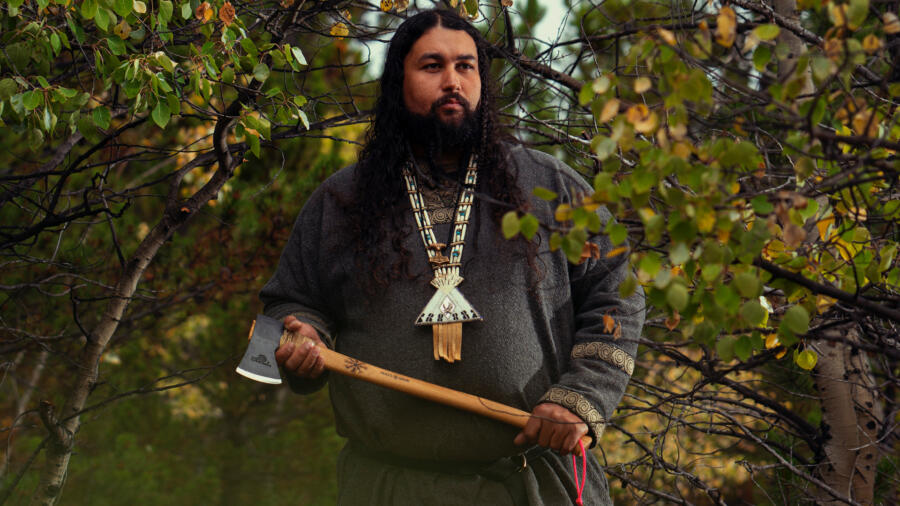
BLOG COMMENT: Biko has a chance of winning this, not because of his survival skills which appear to be limited, but because of his fat reserves, and smart selection of tools. Not trying to be crude or rude, but ample weight has carried others to victory in past events. With a little food from hunting, fishing & trapping, he has the potential to be $500k richer after this event, IF he has the mental toughness. His young age could be an advantage in stamina, but a disadvantage in experience.
Age: 30
Hometown: Otis, OR
Profession: Construction Laborer/ Lead Singer
With the heart of a mountain Viking
and the soul of a skald, Biko is most at home in the wild. He grew up in the
mountains of Topanga Canyon, California, where his parents shared with him
their love of the wilderness. Family vacations involved camping, backpacking,
snowboarding, snorkeling, spear fishing or hunting. Wilderness and survival
skills were prized in his family. Biko’s father, a former Los Angeles sheriff’s
sergeant and Marine veteran, shared a passion for wilderness outings and
hunting and fishing, that he learned from his own father as a child in Fiji.
“In a survival situation,” was Biko’s dad’s constant mantra. He taught Biko and
his older brother everything about wilderness survival training. His mom
rambled the canyon trails with Biko, his dogs and his friends. When he was
older, Biko trained with his Dad’s search and rescue team and he even
participated in avalanche training.
Biko loves the Norse gods and
following in the old heathen ways. He spars with sword, axe and shield with like-minded
friends, and loves building, welding, and forging with his own hands. These are
all skills he puts to good use on the property he owns with his fiancé, Erin,
in the woods of Western Oregon. Just before leaving to compete on Alone, Biko
learned his fiancé is expecting twins—their first children. Taking on the Alone
challenge will be his greatest journey until his next step—fatherhood.
Music is in Biko’s blood. His
grandparents are blues musicians in New Orleans, and he formed his first band
when he was 9. By 14, his growls, screams and strong baritone put him at the
front of metal bands. He became the lead singer of the melodic death metal band
Sirion, which became one of the top LA area local metal bands. In Oregon, he is
part of a heathen folk band, Endelos, that plays at local mead halls, pubs and
festivals.
Biko has longed for an adventure
like Alone his whole life. To help Biko prepare for Alone, his dad camped out
on Biko’s property. Together they worked day and night to train for this epic adventure.
He will test his skills, his mental will and his voice. Not to survive, but to
thrive and tell his saga.
Here are the ten items
Biko selected to bring on his survival journey to Grizzly Mountain:
1. Pot
2. Sleeping bag
3. Ferro rod
4. Multitool
5. Axe
6. Saw
7. Fishing line and hooks
8. Trapping wire
9. Paracord
10. Bow and arrows
BLOG COMMENT: Military SERE training and a fair selection of tools, give Colter a reasonable chance to win, but no Ferro Rod demonstrates confidence, yet may be his his failing, unless he is successful starting a friction fire. If he is good enough to do this, he has a good chance to be in the Final 4.
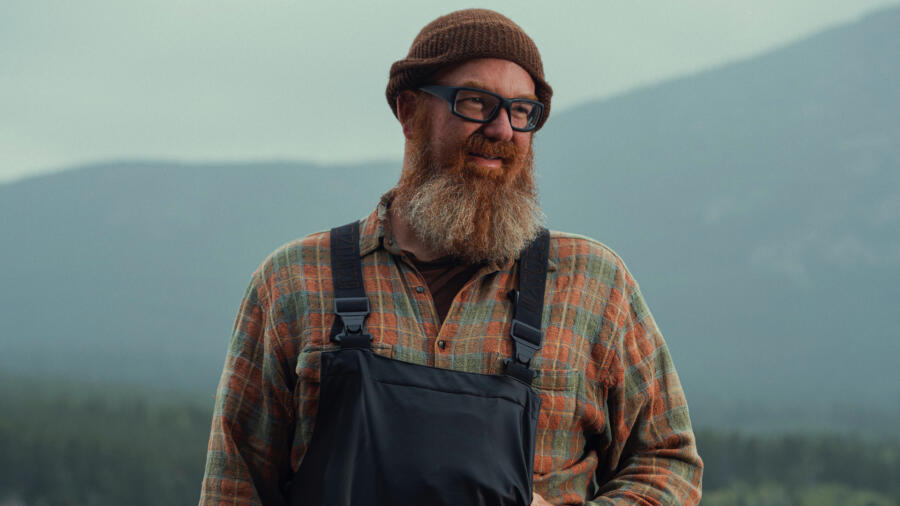
Age: 36
Hometown: Hobbit Hole, AK
Profession: Homesteader & Educator
Colter was born in Montana, raised in Oregon, and has spent the last 14
years living, working and homesteading in the Alaskan bush—far from the road
system.
While he grew up hunting and fishing with his family and friends, it wasn’t
until at age 22 when Colter moved into the fly-in only native village of
Kokhanok, Alaska, that he actually understood what living off of the land
means. With the mentorship of the local residents, it was there that he began
the physically, mentally, emotionally and spiritually challenging and rewarding
pursuit of a more subsistence-based lifestyle. He discovered that it was more
stimulating, hence fulfilling, to accomplish something for himself rather than
trade money and have someone else do it for him.
After 10 years of working in public education in rural Alaska, Colter found
a unique opportunity to combine his passions of teaching and living off of the
land. For the past three years he’s been employed as a homesteader and educator
by the Tidelines Institute, a field school located on a remote island in
Southeast Alaska. Each summer, the school hosts environmental education courses
where Colter gets to share his enthusiasm and curiosity with students by
teaching “homesteading” skills each afternoon; milling wood and construction,
blacksmithing, foraging, gardening, tanning hides and fish skins, food
preservation and more. And in the winters, when he has the islands to himself,
Colter enjoys the peaceful, slow paced life and deepening his connection with
both himself and the natural world.
Colter hopes to combine modern homesteading science and skills with
indigenous wisdom and traditions to not only win season 8 of Alone, but to
demonstrate the beauty, meaning and fun that can be found when we slow down and
simplify our lives.
Here are the ten items Colter selected to bring on his
survival journey to Grizzly Mountain:
1. Sleeping bag
2. Pot
3. Axe
4. Saw
5. Tarp
6. Bow and arrows
7. Snare wire
8. Fishing line and hooks
9. Multitool
10. Paracord
BLOG COMMENT: Alaska wilderness experience and accustom to working hard as a carpenter, gives Jordon a good chance of winning. Watch his trapping/fishing skills for his key to success, and his 5 lbs of food rations will keep him strong for several days until he can start harvesting food.
Age: 43
Hometown: Oak Ridge, TN
Profession: Carpenter
Jordon was born and raised in Maine, where he took to the woods and
primitive living at an early age. He joined his family in beaver trapping, deer
and bird hunting, and catching brook trout from mountain streams along the
Canadian border.
Restless at heart, Jordon began a life-defining journey at age 19, when he
loaded everything he owned into a beat up old truck and moved to Alaska. There,
he spent nine years climbing mountains, hunting, fishing, snowboarding and
somehow surviving his often reckless adventures, which included spending many
shelterless nights at -40ºF degrees and once being swept down a mountainside by
an avalanche.
A carpenter by trade, Jordon’s work eventually had him traveling across the
United States. Each location offered him a new type of wilderness experience. A
job in Tennessee led him to settle down once he met his wife and started his
family. He spends much of his time now running his construction company and
passing on his outdoor knowledge and experience to his 10-year-old son.
By participating on Alone, Jordon hopes to rekindle his adventurous spirit
of the past, meld it with his present insight and knowledge, and create a
legacy for the future with the ultimate story to one day tell his
grandchildren.
Here are the ten items Jordon selected to bring on his
survival journey to Grizzly Mountain:
1. Sleeping bag
2. Ferro rod
3. Pot
4. Axe
5. Saw
6. Multitool
7. Snare wire
8. Fishing line and hooks
9. Bow and arrows
10. Food ration
BLOG COMMENT: Wilderness survival Instructor is a plus, but this will be the extreme opposite of what Matt is accustom to, and will require substantial adaptation to have a chance of winning. Failing to bring a Ferro Rod may put him out of the game quickly. If he passes the cold, wet region test of building a friction fire, he has a good chance to be in the Final 4.
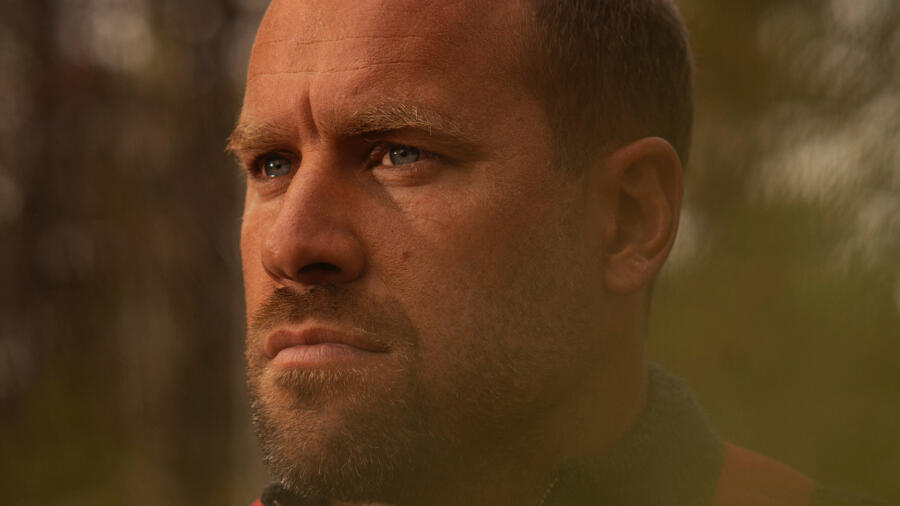
Age: 42
Hometown: St. Croix, U.S. Virgin Islands
Profession: Wilderness Survival Instructor
Matt grew up in Norfolk, Virginia as a typical suburban/city kid. Family
camping trips sparked a deeper interest in nature, which grew through the
years.
As a young adult, a chance meeting with a childhood friend resulted in him
acquiring a book by Tom Brown Jr. and, during his few years of homeless
wandering, the seed planted by that book and others became fertilized. After
taking a class at Tom Brown Jr.’s Tracker School, Matt made primitive survival
his life’s focus. During his almost 7 years as a full-time instructor, he met
his wife and the two of them lived year-round in a primitive shelter while
teaching in the Pine Barrens in New Jersey, encompassing all aspects of
survival.
In 2012, Matt and his wife took an amazing opportunity and bought an
eco-camp in St. Croix in the US Virgin Islands called Mt. Victory Camp. There,
they run their own wilderness survival school, Caribbean Earth Skills, which
teaches both adults and children. The couple is also raising their two-year-old
son and six-year-old daughter.
Matt sees Alone as an opportunity to hone his skills and challenge himself
in a new environment. As a lifelong learner, he is looking to humble himself
and learn to fuse with the landscape and his instincts. More importantly, he
sees survival experiences as a spiritual quest and a chance to become a better
human being and hopefully tell a few good jokes along the way.
Here are the ten items Matt selected to bring on his survival
journey to Grizzly Mountain:
1. Bow and arrows
2. Fishing line and hooks
3. Knife
4. Saw
5. Sleeping bag
6. Paracord
7. Pot
8. Water bottle
9. Food ration
10. Snare wire

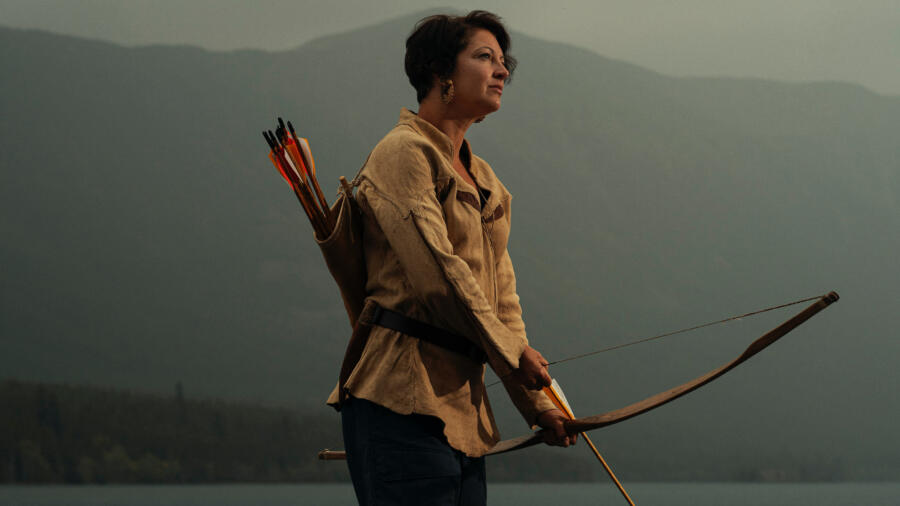
BLOG COMMENT: One of the older, potentially more experienced candidates, she selected a good set of tools. Her cold weather experience can give her an advantage, but I hope to be wrong is saying she is unlikely to be the first female winner.
Age: 46
Hometown: Cherryfield, ME
Profession: Educational Consultant
Michelle was raised on the Maine coast, where she grew up exploring the
forest and seaside areas. She spent a majority of her free time outdoors with
her older brother wandering the woods, fishing off the town wharf, combing the
shore, and generally getting up to childhood mischief. Her mother, a teacher,
and her uncle, an avid outdoorsman, had a significant hand in inspiring her
love of nature. They taught her all about the incredible world around her and
would always take her camping and fishing.
Michelle received her degree in elementary education but, instead of
entering the classroom after graduation, she chose to pursue bushcraft studies.
She lived primitively in a semi-subterranean dwelling for nearly two years,
taking classes and practicing various skills such as tracking, shelter making
and wild edible identification. For years, Michelle ran and assisted trainings
for adults and children to help them connect with the wilderness.
Eventually, she ended up in a public school in bush Alaska, teaching
Siberian Yup’ik children on a remote island off the coast of Nome, where she
continued to learn traditional skills from the village elders. There, she met
her husband Doug, also a teacher, and they now make their home in rural Maine
renovating a farmhouse from the 1820s.
When not providing professional development to teachers around the country,
Michelle can be found traveling the world, practicing indigenous skills, scuba
diving, and gardening. She looks forward to connecting with an amazing new
wilderness area and learning as much as she possibly can from the land with all
of the challenges and opportunities it will offer.
Here are the ten items Michelle selected to bring on
her survival journey to Grizzly Mountain:
1. Sleeping bag
2. Pot
3. Ferro Rod
4. Multitool
5. Saw
6. Axe
7. Snare wire
8. Fishing line and hooks
9. Bow and Arrows
10. Paracord

BLOG COMMENT: With a good set of tools, fishing and hunting experience Clay can win, as his Bow skills can prove to be a huge advantage. His Florida wilderness experience is good, but this will be the extreme opposite (cold). With a focus on a good shelter and ample fire wood, he is a likely candidate to be in the Final 4.
Age: 40
Hometown: Milton, FL
Profession: Professional Bowyer & Hunter
Clay Hayes has been a lifelong student of the woods. Growing up in the rural
pine woods of northwest Florida, he honed the skills in hunting, fishing and
trapping that would serve him for the rest of his life. He has always been
drawn to hunter/gatherer cultures and the self-reliant lifestyle they embody.
As a child in the Florida backwoods, he practiced the primitive skills he
admired in those self-reliant cultures and dreamed of someday living a similar
life in the Rocky Mountains.
Those childhood dreams eventually led him into a career as a wildlife
biologist, where he got to work in some of the most remote and beautiful
landscapes in the lower 48. But despite investing seven years of college and
ten years in the job, his true passion was always primitive and traditional archery.
In 2017, he left the biology career behind to focus on teaching primitive bow
building and archery through online videos and in-person classes.
Since building his first successful bow in 1999, Clay has introduced tens of
thousands of people to traditional and primitive archery through his books,
magazine articles and online videos.
Clay lives with his wife Liz and two sons, Coye and Fen, on their homestead
in North Idaho. Together they hunt, fish, forage and grow a large garden.
Raising their two boys in close connection with the earth, with a practical
understanding of nature and a sense of self-reliance, is important to both Clay
and Liz.
Here are the ten items Clay selected to bring on his
survival journey to Grizzly Mountain:
1. Sleeping bag
2. Pot
3. Axe
4. Saw
5. Multitool
6. Bow and arrows
7. Paracord
8. Fishing line and hooks
9. Snare wire
10. Ferro rods
BLOG COMMENT: With amazing credentials, Theresa could be a finalist for sure, but she could also quit early in the game, as this environment will not be like any class room she has ever experienced. The degree of experience from her Experimental Archaeology is uncertain but could prove to be a big advantage if she has a lot of hands on field experience. I'd love to chat and learn more about this interesting field. Theresa is likely a rising or falling star, with either a strong performance or early tap out.
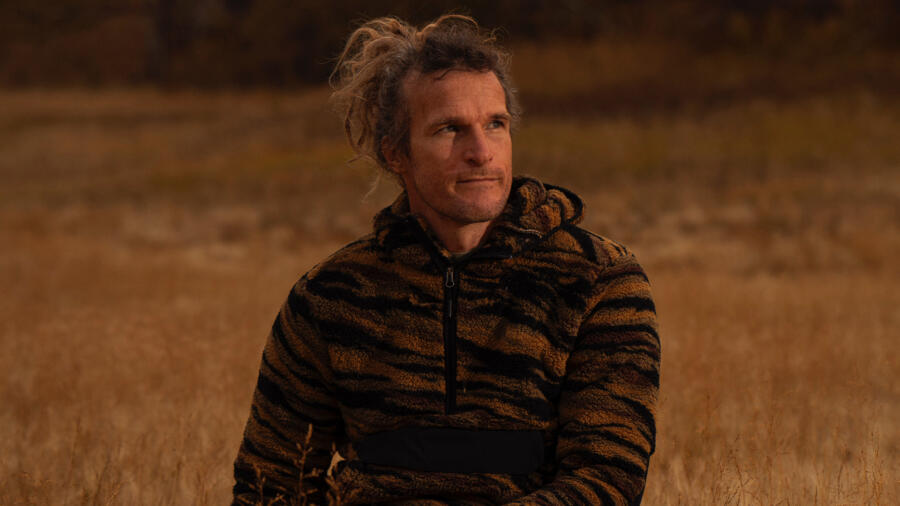
Age: 40
Hometown: Exeter, UK
Profession: Prehistoric Leather Specialist
Dr. Theresa Emmerich Kamper is an avid practitioner of traditional living
skills and primitive technology of all kinds and has tanned skins using
traditional technologies for over twenty-five years. She originates from the
state of Wyoming in the United States, where she was lucky enough to grow up as
part of a family of outdoor enthusiasts. The vast tracks of wilderness
surrounding her hometown allowed ample opportunity to practice and hone her
practical skill sets.
Learning to tan was a natural offshoot of the attempt to use as much of the
animal as possible and had the added bonus of producing a beautiful end
product. Through much trial and error and with the support of very tolerant
parents, Theresa learned to brain tan skins between the age of 12 and 13. Later
interaction with other traditional tanners and excellent written information
vastly improved the efficiency and quality of her tanning process.
Theresa has taught various tannage types such as fat tan, vegetable tan,
alum taw and rawhide production to groups ranging from bush crafters to
University students for the past nine years.
In addition to her main area of expertise in tanning technologies, she has
also taught a wide range of traditional living skills, including the
construction and use of traditional weapons, the use of plant and animal
fibres, patterning and clothing construction, basketry, clay processing,
pottery manufacture and firing, shelter construction and use, friction fire
lighting and basic flint knapping and stone tool construction and use.
Theresa holds a master’s degree in Experimental Archaeology from the University
of Exeter, as well as a PhD on the microscopic analysis of prehistoric
processed skin artefacts. Her background includes an internship with the
Smithsonian National Museum of Natural History, work with the Openarch project
funded by the Culture Program of the European Union, where she was heavily
involved in experimental work and public demonstrations at archaeological open
air museums, giving international workshops, presenting at numerous
conferences, consulting on television documentaries, co-authoring a chapter in
Life-Cycle of Structures in Experimental Archaeology: an object biography
approach with Sidestone Press. Her recently released book titled, Determining
Prehistoric Skin Processing Technologies: the macro and microscopic
characteristics of experimental samples, is also available from Sidestone
Press.
Dr. Emmerich Kamper is currently an honorary research fellow with the
University of Exeter, in the United Kingdom and teaches practical courses
across Europe, North America and the Near East on various tannage technologies
as well as continuing to engage in research projects with a broad array of
museum and academic institutions. Alone was an opportunity to put a lifetime of
learning into everyday use in a long-term living situation, and was an incredible
learning experience!
Here are the ten items Theresa selected to bring on
her survival journey to Grizzly Mountain:
1. Sleeping bag
2. Pot
3. Knife
4. Saw
5. Food ration
6. Ferro rod
7. Snare wire
8. Fishing line and hooks
9. Bow and arrows
10. Paracord
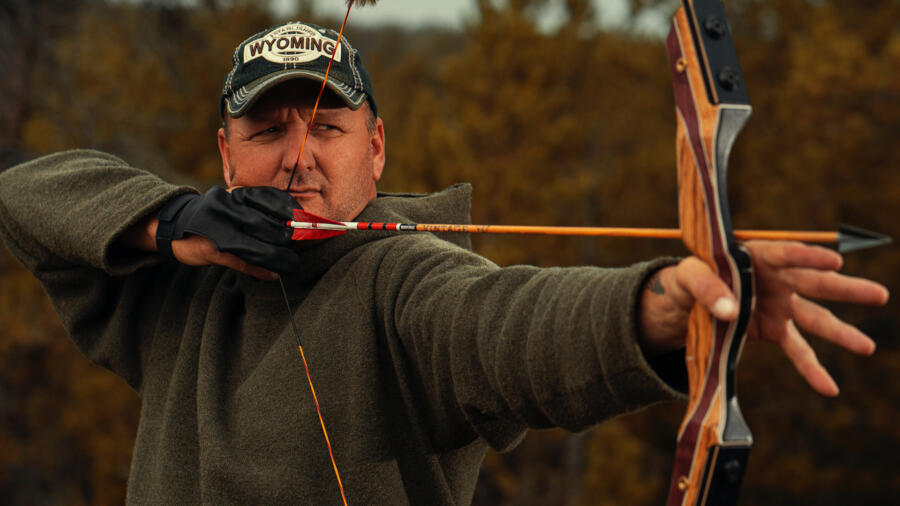
BLOG COMMENT: Hard working country boy, hunting and fishing, lots of time spent in the wilderness, Tim has the potential to do well in this event.
Age: 48
Hometown: Laramie, WY
Profession: Oil Rig Roughneck
Born in Montana, Tim was raised in Wyoming. He grew up in the country, where
raising livestock and growing your own food was a normal, everyday way of life.
Since he was surrounded by mountain men gatherings, wild game hunting, fly
fishing, and remote wilderness camping, his passion for wilderness living
skills developed at a young age. With his deep fascination with the mountains
of Wyoming, it was common for Tim to spend weeks at a time alone in the vast
wilderness of the Bighorn Mountain range.
Tim has spent his adult life working on the oil rigs of the Midwest from
Utah to North Dakota. Hard work in extreme conditions has been the normal
environment for the majority of his career. The life of a roughneck also meant
being away from his family for weeks at a time on a regular basis. Tim’s family
and children are the most important part of his life. Every decision he makes
and every action he takes is for the benefit of his children.
When not working, Tim spends all his time in the wilds of the Snowy Range
mountains in Southern Wyoming. There, he built a remote off-grid cabin where he
and his family spend almost all of their free time learning and living off of
the land. An avid and successful big game bowhunter, every year Tim hunts elk,
deer and bear. He currently has two bears in the Pope & Young record book,
recognized as the official repository for records on bow-harvested North
American big game animals.
Additionally, he is excited for the opportunity to culminate the skills he
has learned during his life, as well as the hardships he has endured, and
achieve a successful wilderness experience.
Here are the ten items Tim selected to bring on his
survival journey to Grizzly Mountain:
1. Sleeping bag
2. Pot
3. Ferro rod
4. Bow and arrows
5. Multitool
6. Saw
7. Axe
8. Fishing line and hooks
9. Paracord
10. Food ration
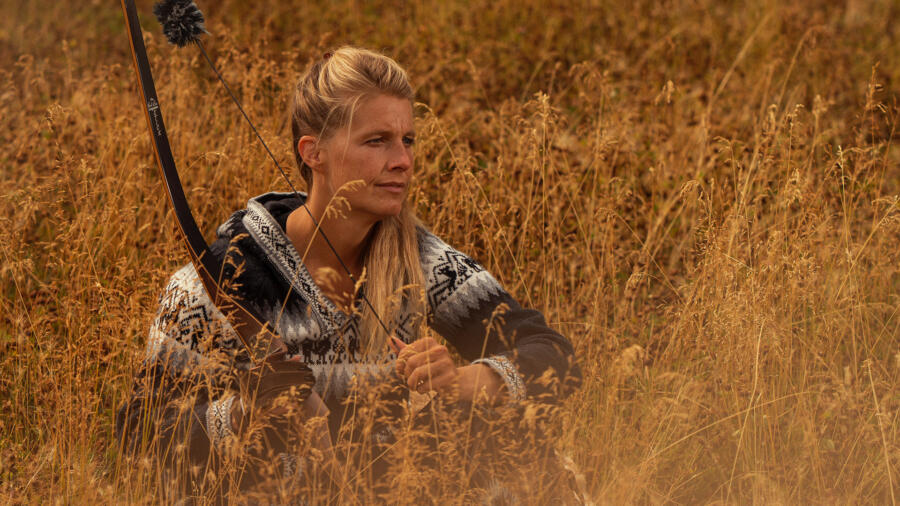
BLOG COMMENT: With hunting, trapping and fishing experience that will be a plus, Rose can be a strong candidate IF she can make these skills work for her. Her attractive slim figure does not bring many calories, so she will need to get off to a good start finding and building some food supplies to have a chance of winning.
Age: 43
Hometown: Wellsboro, PA
Profession: Retail Sporting Goods Shop and
Training Center Owner
Rose grew up in Tioga County, PA, where she spent most of her childhood
hunting and fishing the trout streams of the beautiful Pine Creek Gorge area.
Learning these skills and having an interest in sustainable living helped Rose
develop an adaptable and agile nature. While most of her childhood was spent
moving from one environment to another or from one home to another, Rose has
always found a way to make the changes and curveballs work for her as she navigates
through life’s journey.
As a mother of a 25-year-old daughter and a 22-year-old son, Rose aimed to
raise her children with the knowledge they would need to live sustainable
lives. This included teaching them how to garden, hunt, trap, fish, and raise
and harvest farm animals. Now that her children are grown, Rose spends most of
her free time teaching local youths about the importance of hunting, trapping,
and the cultural aspects associated with understanding conservation. Whether
it’s through community wide classes or showcasing her own pursuit of a bow
North American Super Slam, Rose always promotes understanding each animal and
directly showing how conservation is important. Some of the hunts that Rose
showcases include Musk Oxen in Greenland and invasive species like Pythons in
the Florida Everglades.
Because of her lifestyle, travels, core beliefs, daily practices, and
lessons learned, Rose believes that her drive and determination to never quit
will put her at an advantage. While Season 8 of Alone will be one of the most
challenging adventures of Rose’s journey, she is looking forward to putting all
of her skills together to create a sustainable life for herself in the
wilderness.
Here are the ten items Rose selected to bring on her
survival journey to Grizzly Mountain:
1. Bow and arrows
2. Sleeping bag
3. Multitool
4. Fishing line and hooks
5. Pot
6. Snare wire
7. Paracord
8. Saw
9. Axe
10. Ferro rod
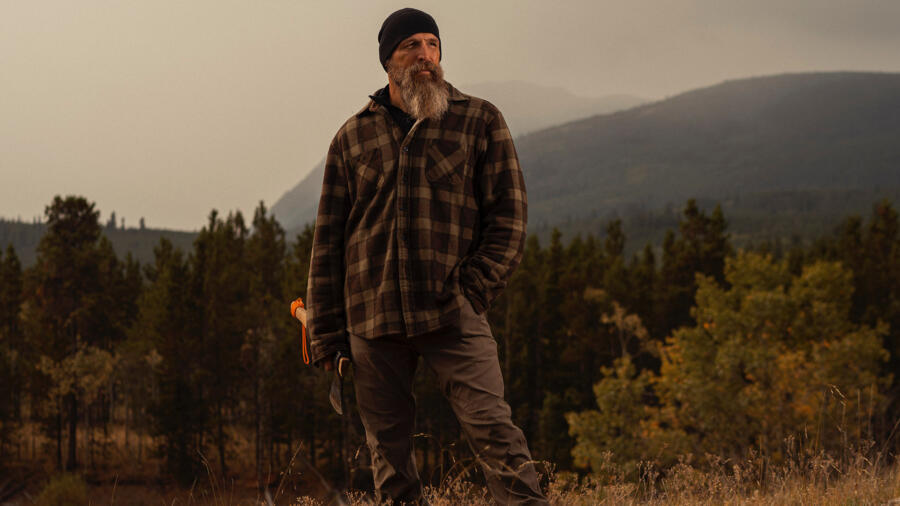
BLOG COMMENT: Looking like a Mountain man, Nate's military experience, especially the SERE training makes him a strong contender, but he is one of the older participants; if this translates to experience and working smart, he can be a Final 4 candidate, but he must work smart, and not make mistakes that require a lot of additional work. Chance / Luck may be a factor in his destiny.
Age: 47
Hometown: East Jordan, MI
Profession: Retired Military/Homesteader
Growing up in rural Ohio, Nate Weber spent his early years outdoors (like
most kids back then). Eager to find his place in the world, Nate joined the
Navy three days after graduating high school. He spent the first twelve years
of his military career as a Navy Corpsman, graduating from Field Medical
School, EMT school and Cardiovascular Medical School. Even though his love for
medicine has never waned, Nate wanted to explore other avenues, too. He
accepted a commission as an Aviation Warrant Officer in the US Army to fly the
Kiowa Warrior helicopter. Nate’s twelve years in the Army included SERE school,
becoming an Instructor Pilot and many deployments all over the world.
Recently retired, Nate, his wife, and their five children decided to finally
settle down for good in Northern Michigan where the children can enjoy a life
outdoors, living off the land, and understanding nature in a more intimate and
organic setting of real life living. For the past two years, the family has been
living in a tiny home Nate and his boys built on the chassis of an old
semi-truck. They are developing their land into a small homestead, as they move
towards being completely self-sustainable.
In his spare time, Nate helps coach the local middle school football and
track teams, hosting Air-Soft tournaments in the woods, snowmobiling in the
U.P., researching and discussing primal nutrition and medicine with his wife,
and grilling up the perfect ribeye over an open fire.
In joining the show, Nate hopes to perfect his own survival skills and to
learn more about what makes him tick. Though Nate’s survival training has been
mainly through formal military training, it is his ability to think outside the
box, to adapt to any situation, to problem solve his way through any challenge,
and to maintain a positive attitude and spirit against all odds that makes him
well suited to face this challenge. These are the qualities and virtues he
lives by in his everyday life and strives to teach to his children and all those
he encounters.
Here are the ten items Nate selected to bring on his
survival journey to Grizzly Mountain:
1. Sleeping bag
2. Pot
3. Ferro rod
4. Paracord
5. Snare wire
6. Bow and Arrows
7. Fishing line and hooks
8. Axe
9. Saw
10. Multitool
For more information, click below.
Top 10 List of Prepper info
Top Rated Prepper Handbook Posts of all time
Top Rated Prepper Website
Top 15 Prepper Movies or Shows'
Or click on a label below for similar topics