Wednesday, June 15, 2016

Truth about the AR 15

AR is short for ArmaLite Rifle which is the company that first designed the rifle.  The AR is a low powered rifle that primarily uses NATO ammo that is in compliance with the Geneva Convention on modern warfare.  This basically means the bullets make a small clean wound that is easy to treat as opposed to the common Law Enforcement or Personal Protection ammo that expands on impact creating a huge fatal wound cavity.

In some states like Washington, all big game must be hunted with a minimum of .24 caliber ammunition – relegating the AR-15 to small game and varmint duty exactly because it is a low-powered rifle.  So the AR-15 is NOT a “high powered” rifle. Yes, it has more power than a handgun – all rifles do.

An AR 15 is NOT an assault rifle and is NOT an Automatic. For more factual information on this topic, see the following link: http://tribunist.com/news/when-you-hear-someone-call-an-ar-15-an-assault-rifle-show-them-this/
 
AR slug size below:
Here is BEST link: http://assaultweapontruth.com/
For additional information see the following links: 
Blog Table of Contents;
Or click on a label below for similar topics.


Saturday, June 11, 2016

Delivering Babies - Post Collapse

PREPARING FOR THE BIRTH
1. Call for help if possible. Contact emergency services. That way, even if you have to deliver the baby yourself, help will arrive soon if you experience complications. The dispatcher should also be able to either talk you through the delivery or connect you to someone who can.
  • If the mother has a doctor or midwife, call that person too. The medical professional can often stay on the phone and help guide you through the process.
2. Determine how far labor has progressed. The first stage of labor is called the “latent” stage, where the body is getting ready to deliver by dilating the cervix. It can take a long time, especially if this is the woman's first child. The second, or “active” stage occurs when the cervix has completely dilated.
  • Women may not experience as much pain or discomfort during this stage as later stages.
  • If the woman is fully dilated and you can see the baby's head crowning, she's in stage two. Wash your hands, skip to the next section and get ready to catch the baby.
  • Unless you have been trained to do so, don't try to examine the cervix. Just watch to see if the head begins to appear.
3. Time contractions. Time the contractions from the beginning of one to the beginning of the next, and note how long they last. The further along labor is, the more regular, stronger, and closer together contractions become. Here's what you need to know about contractions:
  • Contractions that are 10 minutes apart or less are a sign that the mother has entered labor. Physicians recommend that you contact the hospital when contractions are 5 minutes apart and last 60 seconds, and this activity has been going for for an hour. If this is the case, you probably have time to make it to the hospital if you live close to one.
  • First-time mothers are likely to give birth when contractions are three to five minutes apart and last 40 to 90 seconds, increasing in strength and frequency for at least an hour.
  • If the contractions are two minutes or less apart, buckle down and get ready to deliver the baby, especially if the mother's had other children and they were fast labors. Also, if the mother feels like she's going to have a bowel movement, the baby is probably moving through the birth canal, creating pressure on the rectum, and is on its way out.
  • If the baby is preterm, you should contact the mother's physician and emergency services at any signs of labor.
4. Sanitize your arms and hands. Remove any jewelry, such as rings or watches. Wash your hands thoroughly with antimicrobial soap and warm water. Scrub your arms all the way up to your elbows. If you have the time, wash your hands for five minutes; if you don’t have time for that, wash them thoroughly for at least one minute.
  • Remember to scrub in between your fingers and under your nails. Use a nail brush or even a toothbrush to clean under your nails.
  • Wear sterile gloves if available. Don’t wear things like dish washing gloves, which are likely loaded with bacteria.
  • To finish (or if you don't have access to soap and water), use an alcohol-based hand sanitizing product or rubbing alcohol to kill off any bacteria and viruses that may have been on your skin. This helps prevent giving the mother or the baby an infection.
5. Prepare a birthing area. Get set up so that you have everything you'll need within easy reach, and so the mother is as comfortable as possible. There will be a mess afterwards, so you may want to have the birthing area somewhere you don't mind getting messy.
  • Collect clean towels and clean sheets. If you have clean waterproof tablecloths or a clean vinyl shower curtain, these are excellent at preventing blood and other fluids from staining furniture or carpeting. In a pinch, you can use newspapers, but they are not as sanitary.
  • Get a blanket or something warm and soft to wrap the baby in. The infant must be kept warm once it’s delivered.
  • Find a few pillows. You might need them to prop up the mother as she's pushing. Cover them with clean sheets or towels.
  • Fill a clean bowl with warm water, and get a pair of scissors, a few lengths of string, rubbing alcohol, cotton balls, and a bulb syringe. You may find that sanitary napkins or paper towels are helpful to stop the bleeding later.
  • Get a bucket in case the mother feels nauseated or the need to vomit. You may also want to get a glass of water for the mother. Labor is hard work.
6. Prepare a birthing area. Get set up so that you have everything you'll need within easy reach, and so the mother is as comfortable as possible. There will be a mess afterwards, so you may want to have the birthing area somewhere you don't mind getting messy.
  • Collect clean towels and clean sheets. If you have clean waterproof tablecloths or a clean vinyl shower curtain, these are excellent at preventing blood and other fluids from staining furniture or carpeting. In a pinch, you can use newspapers, but they are not as sanitary.
  • Get a blanket or something warm and soft to wrap the baby in. The infant must be kept warm once it’s delivered.
  • Find a few pillows. You might need them to prop up the mother as she's pushing. Cover them with clean sheets or towels.
  • Fill a clean bowl with warm water, and get a pair of scissors, a few lengths of string, rubbing alcohol, cotton balls, and a bulb syringe. You may find that sanitary napkins or paper towels are helpful to stop the bleeding later.
  • Get a bucket in case the mother feels nauseated or the need to vomit. You may also want to get a glass of water for the mother. Labor is hard work.
7. Help the mother find a comfortable position. She might want to walk around or crouch down during this stage of labor, especially when a contraction hits. As she starts to transition to the second phase, she might want to settle into a position to give birth or cycle through a few different ones. Switching between positions may help the labor progress more smoothly, but let her decide what’s working for her body. Here are four standard positions, and the pros and cons of each:
  • Squatting. This puts gravity to the mother's advantage, and can open the birth canal 20%-30% more than other positions. If you suspect the baby is breech (emerging feet-first), suggest this position as it gives the baby room to rotate. You can help the mother in this position by kneeling behind her and supporting her back.
  • All-fours: This position is gravity-neutral and can ease back pain, and the mother might instinctively choose it. It can provide pain relief if the mother has hemorrhoids. Position yourself behind her if that's the case.
  • Side-lying: This leads to a slower descent through the birth canal, but can lead to a more gentle stretching of the perineum and may reduce tearing. Have the mother lie on her side, with her knees bent, and lift the top leg. She might also need to prop herself up on an elbow.
  • Lithotomy position (lying back). This is the most common position used in hospitals, with the woman lying flat on her back and her legs bent at the knee. It allows maximum access for the caregiver, but it puts a lot of pressure on the mother's back and is not considered ideal. It also may make contractions slower and more painful. If she seems to prefer this position, try putting a few pillows under her back to ease the pain.

DELIVERING THE BABY

1. Guide the mother in pushing. Don't encourage her to push until she feels an unstoppable pressure to do so — you don't want to waste her energy and make her exhausted too early. When women are ready to push, they may feel increased pressure near their low back, perineum, or rectum. It may even feel to her as though she is ready to have a bowel movement. When she is ready, though, you can help guide her through the pushing.
  • Ask the mother to curl forward and tuck her chin. This curved position will help the baby through the pelvis. When pushing, it can be helpful if the mother holds her knees or legs with her hands and pulls her legs back.
  • The area around the vagina will bulge out, until you see the top of the baby's head (crowning). As soon as the baby crowns, it's time for the mother to push in earnest.
  • Encourage her to focus her abdominal muscles to push down, as you might do when you’re trying to make your urine come out faster or having a bowel movement. This can help avoid straining or directing the pushing force upward toward the neck and face.
  • Three to four pushes, lasting 6-8 seconds each, are considered appropriate per contraction. However, it is important to encourage the mother to do whatever comes naturally to her.
  • Keep encouraging deep, slow breathing. Pain can be controlled to different extents through mental relaxation and by concentrating on deep breathing instead of panicking or being distracted by everything that is going on. Different people have different levels of mental control, but deep, slow breathing is always a benefit during childbirth.
  • Understand that the woman may urinate or have a bowel movement during labor. This is normal and is not a cause for concern. Don’t even mention it -- you don’t want to embarrass the mother. 

2. Support the baby's head as it emerges. This step isn't complicated, but it's important. Pay extra attention to these tips:
  • Do not pull on the baby's head or the umbilical cord. This can cause nerve damage.
  • If the cord is wrapped around the baby's neck, which is fairly common, gently lift it over the baby's head or carefully loosen it so the baby can slip through the loop. Do not pull on the cord.
  • It’s natural -- and in fact desirable -- for the baby to pass through the pelvis face-down. If the baby’s face is facing toward the mother’s back, don’t worry. This is actually the best position for delivery.
  • If instead of the head emerging you see the feet or buttocks coming first, you have a breech birth. See instructions for that situation below.
3. Prepare for the body to emerge. When the baby's head rotates to one side (which it will probably do on its own), be prepared for the body to come out with the next push.
  • If the baby's head does not rotate to one side, ask the mother to push again. The baby will likely rotate spontaneously.
  • If the baby's head doesn't rotate without help, gently turn it to one side. This should help a shoulder emerge with the next push. Don't push it if you feel any resistance.
  • Deliver the other shoulder. Gently lift the body toward the mother's stomach to help the other shoulder come through. The rest of the body should follow quickly.
  • Keep supporting the head. The body will be slippery. Make sure you're still providing enough support for the baby's neck, which isn't strong enough to support the head on its own. 
4. Manage complications. Hopefully, all goes well and you've successfully delivered a healthy baby by now. If the delivery seems stalled, though, here's what you can do:
  • If the head comes out and the rest of the body doesn't come out after she pushes three times, have the mother lie on her back. Instruct her to grab her knees and pull her thighs toward her stomach and chest. This is called the McRoberts position, and it's very effective at helping push the baby out. Have her push hard with each contraction.
  • Never push on a mother's abdomen to try to help deliver a stuck baby.
  • If the feet come out first, see the section on breech birth below.
  • If the baby is still stuck and emergency responders are still nowhere near the scene, you could try to guide the baby's head gently downward toward the mother's rectum. This should only be attempted as a last resort, and should not be attempted at all if medical attention will be arriving soon. 
5. Hold the baby so the fluids in its mouth and nose drain. Hold the delivered baby with two hands, one supporting its neck and head. Tilt the head down at about a 45-degree angle to allow the fluids to drain. The feet should be slightly above the head (but don't hold the baby by the feet).
  • You can also wipe any mucus or amniotic fluid from the nose and mouth area with clean, sterile gauze or cloth. 
 6. Place the baby on the mother's chest. Ensure full-skin contact, and cover them both with clean towels or blankets. The skin-to-skin contact encourages a hormone called oxytocin, which will help the mother deliver the placenta.
Position the baby so that its head is still slightly lower than the rest of the body, so fluids can keep draining. If the mother is lying down and the baby's head is on her shoulder and its body is on her breast, this should happen naturally. 
  
7. Make sure the baby is breathing. It should be crying slightly. If it's not, you can take a few steps to help make sure the airway is clear.
  • Rub the body. Physical touch will help the baby breathe. Rub over its back firmly with a blanket while it's still on the mother's chest. If that's not helping, turn the baby so it's facing the ceiling, tilt the head back to straighten the airway, and keep rubbing the body. It might not cry, but doing this ensures that the baby gets the air it needs.
  • Rubbing vigorously with a clean towel can also help stimulate the baby to breathe.
  • Manually clear fluids. If the baby gags or turns blue, wipe fluids out of the mouth and nose with a clean blanket or cloth. If that doesn't do the trick, squeeze the air out of a bulb syringe, put the tip in the nose or mouth, and release the bulb to suck the fluid into the bulb. Repeat until all the fluid is cleared, emptying the bulb between uses. If you don't have a bulb, you can use a drinking straw.
  • If nothing else has worked, try flicking the soles of the baby's feet with your fingers, or gently popping its bottom. Don't slap the baby.
  • If none of this helps, perform infant CPR.
Delivering the Placenta

Prepare for the placenta. Delivering the placenta is the third stage of labor. It will arrive anywhere between a few minutes to an hour after the baby is delivered. The mother will probably feel an urge to push after a few minutes; this is helpful.
  • Put a bowl close to the vagina. Right before it emerges, blood will come out of the vagina and the cord will get longer.
  • Have the mother sit up and push the placenta into the bowl.
  • Rub the mother's stomach below her belly button firmly to help slow down the bleeding. It might hurt her, but it's necessary. Keep rubbing until the uterus feels like a large grapefruit in the lower belly.

  1. Let the baby breastfeed. If the cord isn't stretched too tightly by doing so, encourage the mother to breastfeed as soon as possible. This will help stimulate a contraction and encourage the delivery of the placenta. It may also help slow bleeding. 
    • If breastfeeding isn't an option, stimulating the nipples can also help stimulate delivering the placenta.
  2. Image titled Deliver a Baby Step 21
    3
    Don't pull on the umbilical cord. As the placenta is delivering, don't tug on the cord to hurry it along. Let it come out on its own as the mother pushes. Pulling on it could cause severe damage.
  3. Image titled Deliver a Baby Step 22
    4
    Bag the placenta. Once the placenta is out, place it in a trash bag or a container with a lid. When and if the mother goes to a hospital, the doctor might want to inspect the placenta for any abnormalities.
  4. Image titled Deliver a Baby Step 23
    5
    Decide whether to cut the cord. You should only cut the umbilical cord if professional medical attention is hours away. Otherwise, leave it alone and just make sure it's not pulled tight.
    • If you do need to cut the cord, first feel the cord gently for a pulse. After about ten minutes, the cord will stop pulsing because the placenta has separated. Don't cut it before then.
    • Don't worry about pain. There are no nerve endings in an umbilical cord; neither mother nor child will feel pain when its cut. The cord will, however, be slippery and difficult to handle.
    • Tie a string or lace around the cord, about three inches from the baby's belly button. Tie it tightly with a double knot.
    • Tie another lace about two inches away from the first one, again using a double knot.
    • Using a sterile knife or scissors (that have been boiled in water for 20 minutes or wiped down with rubbing alcohol), cut between the two laces. Don't be surprised if it's rubbery and tough to cut; just take your time.
    • Cover the baby again when the cord is cut.
 For more information including how to deliver a Breech baby, see:
http://www.wikihow.com/Deliver-a-Baby


For additional information see the following links: 
Blog Table of Contents;
Or click on a label below for similar topics.

Edible Wild Plants

Here are links to what we have covered here:

Greenbriar (catbriar)

Large List of Edible Wild Plants

Top Rated Prepper Handbook Posts of all time 
Search Blog:  Edible Plants
 Wilderness Survival

For additional information see the following links: 
Blog Table of Contents;

 https://www.foragingtexas.com/


Or click on a label below for similar topics.

Friday, June 10, 2016

Preppers Garden

For millions of years, humans were nomadic, surviving as hunters and gatherers. Once we learned to domesticate animals and plant gardens, we could settle down, stay longer in one area and sustain larger populations. Our ability to raise livestock and garden are essential to our survival today no matter how good you are at Wilderness Survival.

So how do you plant the ideal Prepper Garden?  Here are some thoughts on what it would include.
  1. First and foremost is ample land with good rich soil.  Long growing seasons with lots of sunshine and rainfall are all important, but also a creek for potential irrigation (and a good back up water supply).  In the Prepper Handbook on Amazon, it calculates that seven (7) acres per person is required for sustainable food supply which includes growing grains and pasture for livestock. 
  2. Nutrition, including protein as meat may be scarce.  To me this also means diet diversity. Greens are easy during the warmer weather, but winter time means things like cabbage, kale, turnips, broccoli.... what else? But you can eat only so much greens.
  3. Year-round food supply - must have crops available at all times of year, or that can be easily preserved like dried beans & corn.  Wheat, rice & oats also preserve well but are much more difficult to harvest.  Sorghum is good to eat and can be used to feed chickens. A huge help to have a small greenhouse or cold frame planter. See our blog on building a greenhouse
  4. Continuous long term producing foods where available. Most modern vegetables are a climax variety, meaning the entire crop ripens at the same time, and then it is gone. These are designed to be harvested all at once and preserved, which takes time, resources and energy.  An ever-bearing type, that theoretically produces a food serving for a family of four every other day of the year would be ideal.  Imagine going out to your garden each day and harvesting what you will be eating for the day.  Fruit trees, blue and black berries near the fence line reproduce each year without replanting. Citrus trees or vegetables producing in a greenhouse year-round is good.  Strawberries given some room and manure will do well year after year.
  5. Preservable foods that can be dried are good, like beans, peas and corn or those that store for long periods like nuts, potatoes and onions. Others that can be canned are good, but imagine how many canning jars would be required to store a winters worth of food for your family.  For two vegetables per day for 270 days or 9 months out of the year, you need at least 540 quart jars.
  6. Select heirloom varieties that are hardy and can produce usable seeds which are a top 10 barter item which also helps others. I would envision providing seeds and tools to neighbors for a share of their crop.
  7. A supply of organic fertilizer is essential for long term gardening. The American Indians would include a fish head with each corn seed when they planted it. A more modern source would be composting, manure from horses, cows, goats and chickens.  The Prepper Handbook also talks about the importance of rotating your crops. 
  8. Gardening tools and books are important too.  Essential tools include good quality shovels, garden rakes, hoes, an old fashion push mower (that doesn't require gasoline), a High Wheel CultivatorLehmans has some good tools to consider.  Wood handles are recommended as they can be replaced.
  9. When it comes to books, they need to be bound books, not electronic books. Some good ones to consider might include the followin:  MiniFarming, The Encyclopedia of Country Living, and The Backyard Homestead Guide to Raising Farm Animals. Remember you must have manure for fertilizer.  Again, Lehmans has some good books and many other things too.
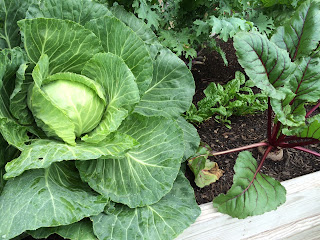
  10. Last but not least, start a garden NOW. Successful gardening takes years to learn so don't wait until it is too late.  Start small and grow it larger each year. Even if it is small, a few potted plants on the patio or in the condo flower beds, get started.  Try to grow a few winter crops each year too.  They are easier in that you don't have to contend with the summer heat, drought, weeds & pests as much. Broccoli, cabbage & cauliflower do well but require a lot of space which is okay if you are not growing a lot of other things.
These are my thoughts, what are yours?
For additional information see the following links: 
Blog Table of Contents;


Bees for Prepping  
Or click on a label below for similar topics.
 

Wednesday, June 8, 2016

Seeds for Survival

Seeds could be one of the best Prepper barter investments because they are low cost, but extremely high value in a total collapse. A $1.99 package of seeds could help feed a family for weeks. So this is something you should never be short on for your own Prepper Garden.

Heirloom varieties, that produce quickly, and grow nutritious foods that can be easily preserved (dried) are the best Prepper seeds.  Having hybrid seeds to use in the early stages is okay as long as they don't cross pollinate with the heirloom varieties and mess up your seed stock.

Foods that store for long periods like beans, peas, sorghum and corn dry and preserve well so I consider these as essential. Rice, wheat and oats are good, but harder to grow and harvest.  Potatoes also preserve fairly well when kept in burlap type bag in a cool dark place.  Citrus fruits will last much longer than most other fruits if left on the tree (not picked).  Nuts like pecans will store for long periods if kept in a cool dry place.

Fast producing seeds like turnips are edible in about 20 days even in cool weather.  Plus turnip seeds are low cost. As a part of my charity plan, covered in the Prepper Handbook, I have a lot of them and at the first sign of anarchy, I will plant them all around the church by the highway to help others have food. 

Foods that grow back year after year with out re-planting are good. Asparagus returns each year, is very hardy, nutritious, delicious and insect resistant.  If I could only have one vegetable, this would be the one; just remember to cut it down to 2" above the ground in the fall when the foliage turns brown and only harvest about half of what grows up, leaving some to reproduce.  Do not harvest the first year.  Fruit and nut trees are some other good examples and nuts store very well. Nut trees take many years to produce so plant them soon and locate some wild ones in the woods and remove any vines or other plants that may be choking them or competing for the nutrients and sunlight. 

Seasonal plants are important too.  You want some foods that plant in the later winter or early spring and ripen quickly (like turnips), but also some that ripen late in the fall or winter like pumpkins and persimmons.  Having a green house for year-round food could be a huge advantage.

While any food is better than starving, it is also good to select seeds that produce foods that you like to eat and would eat on a normal basis. This is good criteria to consider, but secondary to the others.  For example, most of the tender sweet hybrid corn that we enjoy cannot be used for seed as they will not grow or produce much corn if any. During the summer growing season, you can be eating fresh vegetables while you store most of the others for the winter.  Canning is a good way to store vegetables, but requires hundreds of jars and lids.  Drying is a more sustainable way but only works well for some foods. 

Part of a good Seed for Survival plan needs to include rotation.  Seeds get old and won't grow after a few years.  Keeping them refrigerated helps, but what I do is to write the date on them when they arrive.  Then everything more than two years old, I try to plant even if it is in a hidden garden in the country side, along the road or creek or in a meadow, by a lake. I even throw a few in the creek to wash down stream, to hopefully take root and grow.

Here is a list of seeds/foods that I prefer:
  1. Yellow Dent Corn (feed and meal)
  2. Yellow Bantam Corn
  3. Sorghum (chicken feed & good meal)
  4. Pinto Beans
  5. Black Eyed Peas
  6. Purple Hull Peas
  7. Cream Peas
  8. Blue Lake Green Beans
  9. Kentucky Wonder Green Beans
  10. Yellow Crook Neck Squash
  11. Beef Steak Tomatoes
  12. Mary Washington Asparagus
  13. Jersey Giant Asparagus
  14. Kale
  15. Broccoli
  16. Clemson Spineless Okra
  17. Red Potatoes
  18. Irish Potatoes
  19. Onions - Yellow Sweet Spanish
  20. Bell Peppers - California Wonders
  21. Cayenne Peppers
  22. Small Sugar Pumpkins
  23. Danvers Carrots
  24. Turnip - Purple Top White Globe
  25. Wheat (winter & summer varieties)
  26. Oats
  27. Rice
It is important that you know the Planting Dates for your area and Days to Harvest for the varieties of vegetables that you are planing as this is a key part of a sustainable food plan. The Prepper Handbook (at $4.99) has a sustainable food model that will help guide you. In the end, it is better to over produce and have extra for barter than to under produce and starve.

For additional information see the following links: 
Blog Table of Contents;
 

Or click on a label below for similar topics.

Tuesday, June 7, 2016

ILLEGAL IMMIGRATION SOLUTION

Obviously the solution is not to ignore US Immigration Laws and let anyone come and go at will.  We must control our boarders to prevent Terrorist from entering freely. 

At the same time, it is equally obvious that deporting all illegal immigrants is not a solution.  In fact, if all illegal immigrants immediately left the US, we would see a significant recession as a worker shortage brought our country to its knees.  Lets face it, lazy Americans are not going to do the hard jobs that are often performed by immigrants like picking crops; at least not until it pays more or living on welfare is not an option.

So can we all agree the solution is somewhere in the middle?

When it comes down to it, only the Indians as they are often called, are Native Americans. In fact, we are all immigrant descendants.  So where do we start solving this problem?

We must first start by stopping the flow of more illegal immigrants.

Once this is solved, then, and only then, we address the illegal immigrants already here.


A wall is expensive and may not work, but requiring the use of E Verify for all new hires (not existing ones) and implementing employer fines of $50,000 for each illegal immigrant hired & enforcing it will significantly reduce the flow of illegal immigrants coming in to the US. 

Illegal immigrants already working in the US, paying income taxes for the past 2-5 years, not on any form of welfare and no criminal background, will receive a multi-year green card (not citizenship) and are temporarily exempt from deportation along with their immediate law abiding families.  They will be allowed to apply for citizenship like any other immigrant but receive no special consideration just because they broke our laws.

Will there be some sob stories on the news and protests? Yes, the solutions to difficult problems are not easy or they would have been fixed already.  Every illegal immigrant who violently protests or commits a felony, should be immediately deported and never eligible to legally return under any circumstances.  Peaceful protests are 100% acceptable!

Over time, those that are a burden to our country will go home because they won't be able to get jobs or welfare....others will stop coming.... problem solved.  Those that remain will be hard working, tax paying, law abiding American citizens; something our country needs more of.

Author:  Anonymous 

For additional information see the following links: 
Blog Table of Contents;
Or click on a label below for similar topics.


Monday, June 6, 2016

Edible Wild Plants - Dandelion

Dandelion is one of the most recognizable edible wild plants and can be found in sunny yards all over the United States during the spring and warm months.

The leaves, roots, and white stems are edible.  It is rich in vitamins A, B, Thiamine, riboflavin as well as minerals and protein.

Young leaves are good in salad or double boiled while the roots are roasted for making good tasting coffee (without caffeine) or boiled for about thirty minutes before eating.  Experts say the white stem just above the root is the best part when sauteed in bacon drippings or olive oil.

The taste is a bit bitter unless boiled, drained and then boiled again but this also reduces the nutritional value. This is one of those plants that is "edible", but not necessarily delicious. 

For additional information see the following links:      
Blog Table of Contents
https://www.foragingtexas.com/


Sunday, June 5, 2016

Edible Wild Plants - Cattails

Known as the supermarket of the wild, Cattails, also known as bullrush, are a good source of food for the savvy outdoors-person.  The tubers, fresh shoots, the male portion of the flower and the pollen are all edible.

Winter tuber starch granules are removed by hand from fibers while the fresh spring shoots are cut from the tubers.  Older stems can be peeled back to get soft, white edible pith.  The male hotdog shaped part can be steamed before it becomes fluffy and the pollen from a male section can be shaken into a bag and used as a high protein flour. The nutritious tubers are high in calcium, carbohydrates, iron and potassium.

The fluff is good for fire tinder, bedding and insulation, leaves and stems can be woven into baskets and thatch huts.  Burning the fluff or solid seed head makes smoke that helps repel insects.

For additional information see the following links:

Blog Table of Contents

https://www.foragingtexas.com/

Saturday, June 4, 2016

Edible Wild Plants - Greenbriar Roots


Greenbriar, are a common plant found in shady forest year-round and are identified by having both thorns and tendrils. They are also know as Catbriar or Bullbriar.

The edible parts are the young tender vines, tendrils, roots (tubers), leaves, and even berries in January.   The vines and tendrils are eaten raw, baked, boiled, roasted or steamed.  The roots are sliced, then pounded roasted or boiled to free starch.  The berries are eaten raw (not the seeds) and can also be made into jams or jelly.  Black berry jam is better, but they are not available in January.

The tubers are high in starch and minerals while the greens are high in vitamins and minerals.  The youngest, lightest colored tubers are the best.

Greenbriar are usually plentiful through out most of the United States except around the Rocky Mountain range.


For additional information see the following links:

Blog Table of Contents

https://www.foragingtexas.com/ 


Wednesday, June 1, 2016

Salvaging Supplies

Salvaging Supplies in a serious "event" may be essential to survival, yet this is not something we hear much about.  Even if you have supplies, replenishing them will extend the time window that you can survive. You need at least enough supplies to get a big or bigger garden planted and the harvest started.

There are several factors to consider:
  1. The law - is the situation bad enough to justify breaking the law? The answer to this determines our strategy.  If the local law is functioning or outside assistance is expected to arrive, then it is important to obey they law if at all possible.
  2. Risk - how desperate is our situation; this determines how much risk we are willing to take.  Don't underestimate the potential risk in salvaging supplies that are coveted by many people, possibly even desperate, violent ones.  House to house salvaging may be extremely hazardous in free countries where guns are permitted. Protecting your supplies will also require a gun, ammo and a good security plan to prevent loosing them.
Your best approach is to have a Salvage Plan that includes a map of all nearby locations that may have food.  If law and order exists, then that limits you to grocery and convenience stores provided you have cash. If you don't, go back and read our Beginner Prepper List section in the Blog Table of Contents.

IF law and order is gone, and finding food is a mater of life and death, then you should find sources of supplies other than the obvious grocery stores which may be crowded, looted or guarded by gangs.

First print or obtain a local map and regional paper phone books.  Remember Google Maps may not be working so phone books will be valuable. Then start to look for and mark the following on your map:
  1. Wal Mart & Grocery Stores or even better - Delivery Trucks
  2. Truck Stops
  3. Fuel Trucks
  4. Food distribution centers
  5. Gas Stations
  6. Schools
  7. Restaurants
  8. Restaurant supply businesses
  9. Drug Stores
  10. Bottled Water or soft drink distributors
  11. Businesses with large staffs, break rooms or cafeterias
  12. Gun Shops
  13. National Guard Armory
  14. Police Departments
  15. Sporting Goods Stores
  16. Hardware or Farm supply stores 
  17. Day cares for baby formula
Map these and develop supply run routes around your retreat.  There are two basic salvage route approaches:
  • Loop Routes that are shaped like flower petals that go out along certain routes and return via other random parallel routes.  The goal is to salvage triangular shape segments that extend out from your area as opposed to cleaning out everything immediately around your facility.  At the same time, you are exploring far out from your territory.  This route may be best with low populations, limited information, and when risk or threats are considered low.
  • Concentric Ring Routes consisting of circles of increasing diameter.  With these, you first deplete all the supplies that are close to your retreat.  After which you must start going out further and further as supplies are exhausted.  This allows you to learn your immediate area very well and progressively explore out further and further as the rings grow.  This approach might be best for high risk scenarios where you don't want to get too far from home.
The best approach is potentially a couple of small concentric rings to explore your immediate area and then transition to the petal or triangle shaped routes. 
Your Scout / Salvage Teams (never solo) should practice Group Drills that allow them to work together.  The best shape is an expanded diamond (a four person team),  with the person in back staying behind as if secretly tracking the other team members so that if they get captured, the back up person can retreat and get reinforcements, or follow them to their destination to be able to lead a rescue effort.  A bounding over watch formation is best when it is known that the risk is high such as moving in to perform a rescue operation. If you are in the city you should have an Urban Security Plan and in the country, a Passive Layered Security Plan.

If it becomes necessary to Salvage to survive, the situation is serious, and you need to be looking for garden seeds and tools.

For more Prepper information see our:
Blog Table of Contents